You remember the photo. Britney on the red carpet in 1999, two little half-up buns sitting high on her head, denim everywhere, a butterfly clip catching the flash. That image is why space buns refuse to die. They were the unofficial badge of every TRL kid, every Bratz doll, every Lizzie McGuire dream sequence, and now they’re back on the Pinterest grid in a softer, smarter, way more grown-up version.
This space buns tutorial walks you through the exact method I use on myself and on friends who swear they “can’t do hair,” with variations for short hair, long hair, curly hair, and the hat-and-buns combo that quietly took over festival season.
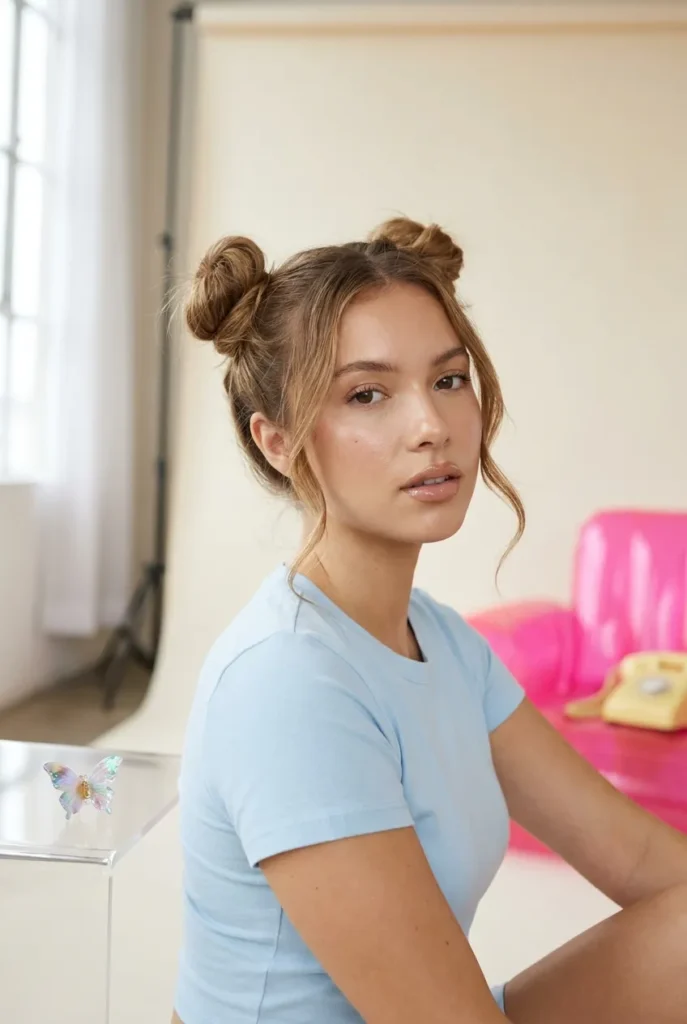
I’ll be honest. I wore space buns to a sixth-grade dance in 2002 with a glitter butterfly clip on each one and zero shame. The version I’m teaching you today does not look like that. It’s cleaner at the base, smarter at the part line, and built to survive a full day in real life. We’re going to keep the playful 2000s heart of it and lose every detail that screams “I am wearing a costume.”
What Makes Space Buns Space Buns (And Not Just Two Buns)
A regular bun sits at the back of your head. Space buns sit high, symmetrical, with a clear center part splitting them. That high placement and the visible parting line are the whole signature. Anything lower than the crown of your head is technically a double bun, which has its own charm, but it reads more ballerina than Britney.
The classic Y2K version had three loud markers: very high placement, tight slicked-back roots, and either rhinestones or butterfly clips in the gap between the buns. The 2026 version softens at least one of those. Most often we soften the slick (a little texture at the roots looks fresher) and skip the rhinestone overload. One small clip, one ribbon, or nothing at all. That edit is what makes the look age up.
Who This Tutorial Is For
This one works for you if you fall into any of these buckets:
- Gen Z first-timers discovering Y2K hair and want a clear walk-through
- Millennials returning to a hairstyle they wore the first time and want a less cringey way to wear it now
- Anyone with shoulder-length or longer hair (and yes, we’ll cover short hair too)
- Curly, coily, kinky, fine, thick, straight — every texture has a path here
- Plus-size readers who are tired of tutorials that pretend body type changes how a bun works (it doesn’t, but framing matters and we’ll address that)
- Anyone over 30 who keeps thinking “can I still pull this off?” Spoiler, yes, with the adjustments below
If you want only one bun-piece nod to the trend without the full commitment, the “Y2K-lite” version under each variation is for you. If you want full mid-2000s festival energy, the “full Y2K” route is right there too.
Your Space Buns Toolkit
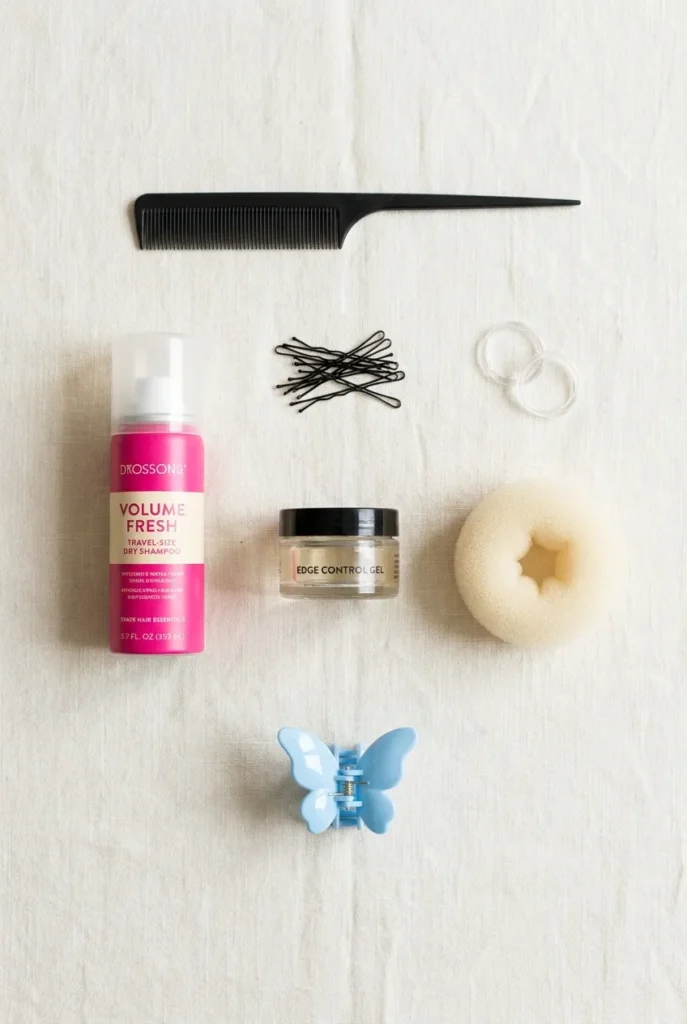
You don’t need much, and you absolutely don’t need to buy anything fancy. Here’s the realistic version of what works:
- Two small clear elastics (the mini ones from Goody at Target work, about $4 for 500)
- Bobby pins matched to your hair color (a 50-pack at Sally Beauty runs around $3)
- Rat-tail comb for the center part (about $5 at Walmart or Sally Beauty)
- Texturizing spray or dry shampoo for grip (Living Proof, Batiste, or Not Your Mother’s all work, $8 to $15 range)
- Optional: edge control or smoothing cream if you want a sleeker root
- Optional: hair donuts or small sock-bun forms if your hair is fine and you want fuller buns
That’s it. No specialty tools. The L’Oréal tutorial and Perfect Locks guide both push a longer shopping list, but you can absolutely build a great space buns set with what’s already in your bathroom drawer.
The PARK Method: 5-Step Space Buns Tutorial
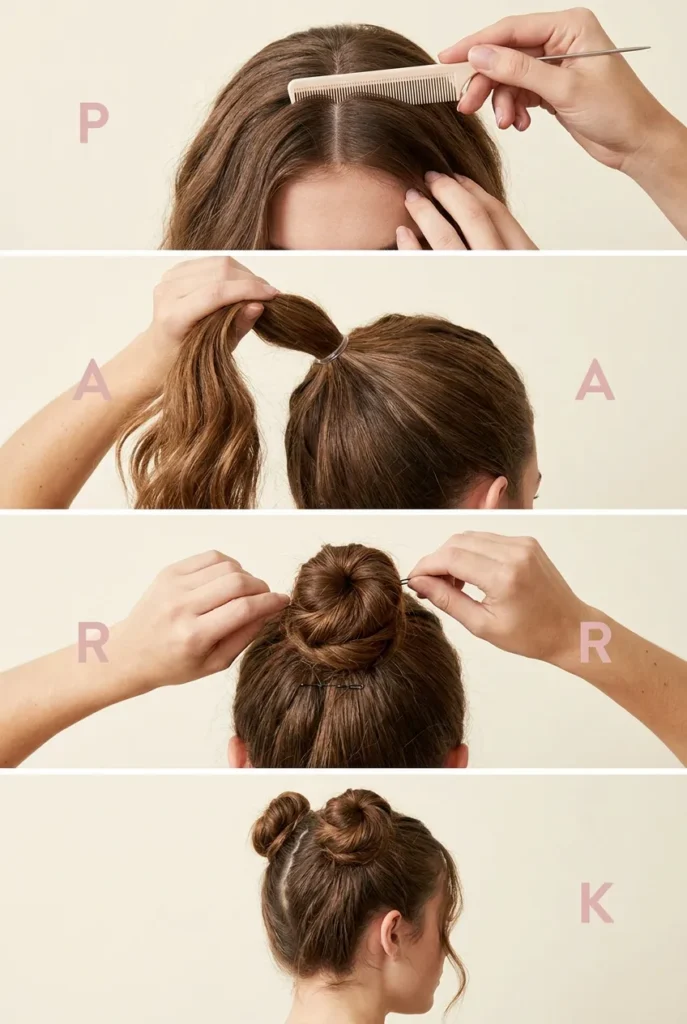
I started calling this the PARK Method when I was teaching it to my younger sister, because every time she rushed she’d get crooked buns. The four beats keep you honest: Part, Anchor, Rotate, Kiss (the ends down with pins). The fifth step is finishing texture. Once it clicks, you can do this in under five minutes.
Step 1: Part down the middle (P)
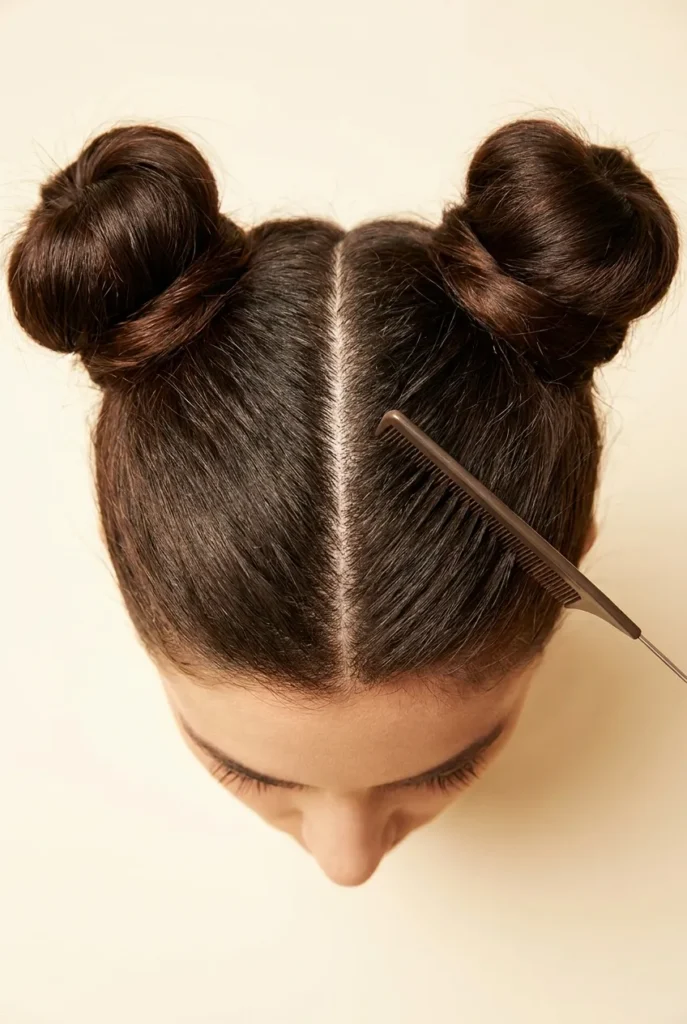
Brush hair smooth first. Using your rat-tail comb, draw a clean line from the center of your hairline straight back to your crown. Stop at the crown, not all the way to the nape. That short, defined part is what makes the look read as space buns instead of pigtails-with-bonus-buns.
Pro tip: if your part keeps wobbling, do it in front of a small handheld mirror with a brighter mirror behind you, so you can see the line from above. Three seconds of double-checking saves a redo.
Step 2: Anchor each section into a high ponytail (A)
Pull one side up to where the corner of your forehead meets the top of your ear, and gather it into a ponytail there. Match the other side. Both ponytails should sit at the same height, not one creeping forward, not one drooping back. Use the mini clear elastics. Wrap each elastic three times for grip.
If you want a more polished early-2000s feel, slick the roots with a tiny dab of edge control before anchoring. If you want lived-in indie sleaze energy, leave the roots a little textured and don’t comb out every flyaway.
Step 3: Rotate the ponytail into a bun (R)
Take one ponytail, twist it loosely along its own length (twist, don’t braid), then coil it around the base of the elastic in a clockwise direction. On the other bun, coil counter-clockwise so the buns mirror each other. That mirrored direction is a tiny detail nobody talks about and it’s why some tutorials end up with buns that look “off” without anyone being able to say why.
If your hair is fine or short, wrap a hair donut around the elastic first and coil over it for a fuller shape.
Step 4: Kiss the ends down with bobby pins (K)
Tuck the tail of each coil under the bun and secure with two or three bobby pins, pushing them in at an angle that bites into the elastic. Don’t pin parallel to your scalp, pin into the elastic. Repeat on the other side. Match the pin count and placement so the buns weigh the same. Lopsided pinning is the number one reason space buns sag by hour three.
Step 5: Finish with texture and face-framing pieces
Pull two thin face-framing strands loose at the temples. Curl them lightly with a small barrel iron if you want, or scrunch with a pea of mousse and let them sit naturally. Spray the whole head lightly with texturizing spray, focusing on the buns themselves. That spray gives the buns dimension so they don’t look flat and gluey in photos.
That’s the entire space buns tutorial in five steps. PARK plus a polish.
Space Buns Tutorial for Every Hair Length
The base method is the same. The tweaks change based on what you’re working with. Here’s how I adjust for each length.
Short Hair Space Buns Tutorial (chin to shoulder length)
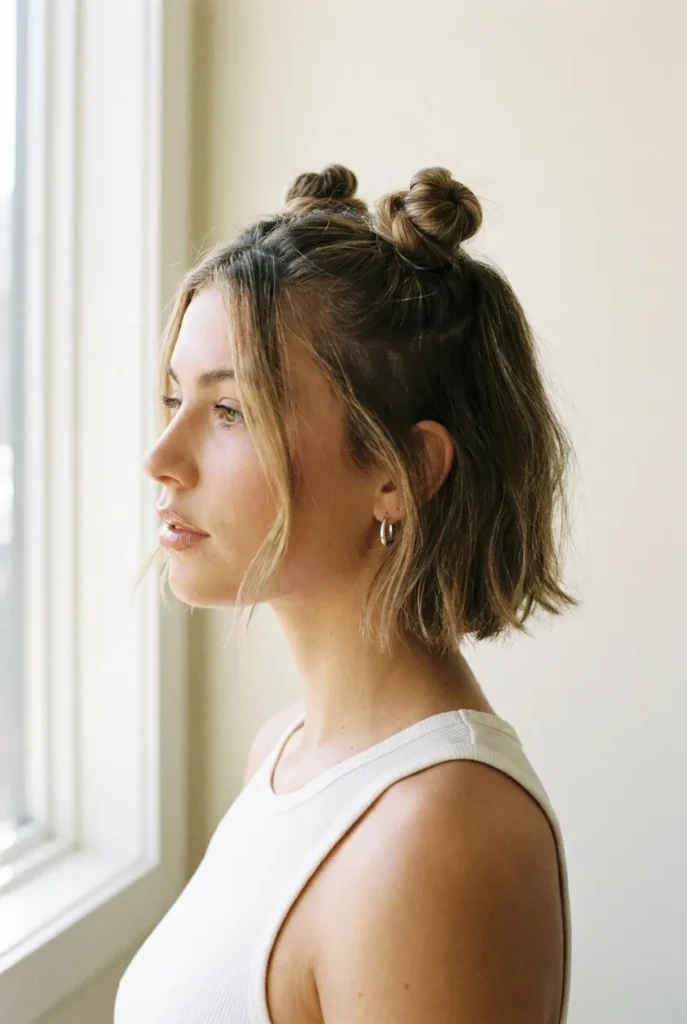
Short hair fights you on space buns for one reason: not enough length to coil. The fix is to lean into mini buns instead of trying to fake a fuller shape. Skip the donut. Twist tighter. Use more pins, smaller ones if you have them.
If your hair stops above your shoulder, do half-up space buns instead. Take only the top section from ear to ear and split that into two buns, leaving the bottom half loose. This is the cleanest space buns tutorial for short hair because you’re working with the longest sections of your hair and not pulling against the shorter back layers.
Pinterest searchers love this exact version, by the way. Half-up half-down space buns are one of the strongest trending pills on the platform right now.
Long Hair Space Buns Tutorial
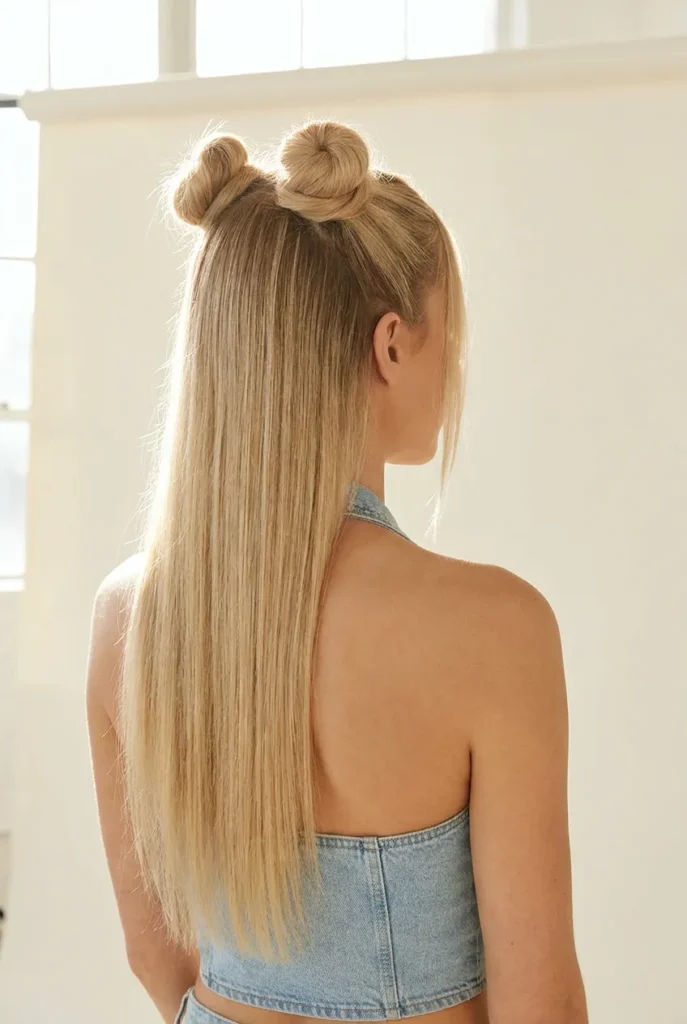
Long hair has the opposite problem. Too much length means heavy buns that drag down by lunch. Three fixes: braid the ponytail before coiling (braid coils stay tighter), tuck the tail under and pin it deep rather than letting it hang, or do a half-up version so you’re only working with the top section.
If your hair is below your bra strap, the half-up route is genuinely the easier, prettier choice. The loose length below acts like the rest of your hair was always going to act, instead of fighting two enormous coils.
Medium Hair Space Buns
Medium hair (collarbone to mid-back) is honestly the sweet spot. The PARK Method works straight through with no special adjustments. You can do full coiled buns, half-up, low, messy, any variation, and they all behave.
Curly, Coily and Textured Hair Space Buns
If you have curly, coily, or kinky hair, throw out the “slick everything down” advice you’ll find on most tutorial sites. That advice is written for straight hair and it makes textured hair look strained and sad.
Instead:
- Stretch first if you want fuller buns: a quick blow-dry on cool with a brush attachment, or banding your hair overnight, gives you more length to coil with while keeping your natural pattern.
- Use edge control for the part line only, not the whole head. A clean parted line at the crown plus textured roots is the modern look.
- Coil with the curl pattern, not against it. If your hair coils naturally to the left, let the bun follow.
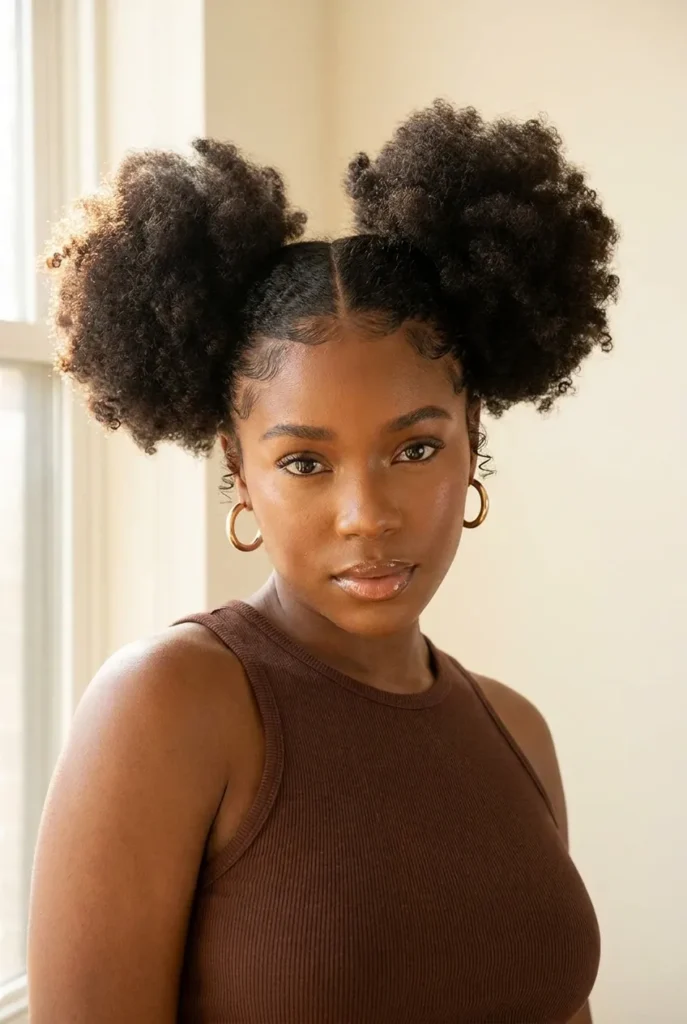
- For 4B/4C textures, mini puff buns are gorgeous and authentic. Don’t force a slick, smooth bun shape if your hair doesn’t want to do that. Two high puffs split by a center part are space buns. Full stop.
- Use a satin scrunchie under the elastic to reduce breakage at the bun base.
Brands like Mielle, The Mane Choice, Camille Rose, and Pattern by Tracee Ellis Ross all make edge controls and curl stretchers that work well for this. SheaMoisture’s curl smoothie at Target works as a budget option.
Low Space Buns and Messy Space Buns
Two trending variations from Pinterest’s guided search that deserve their own moment.
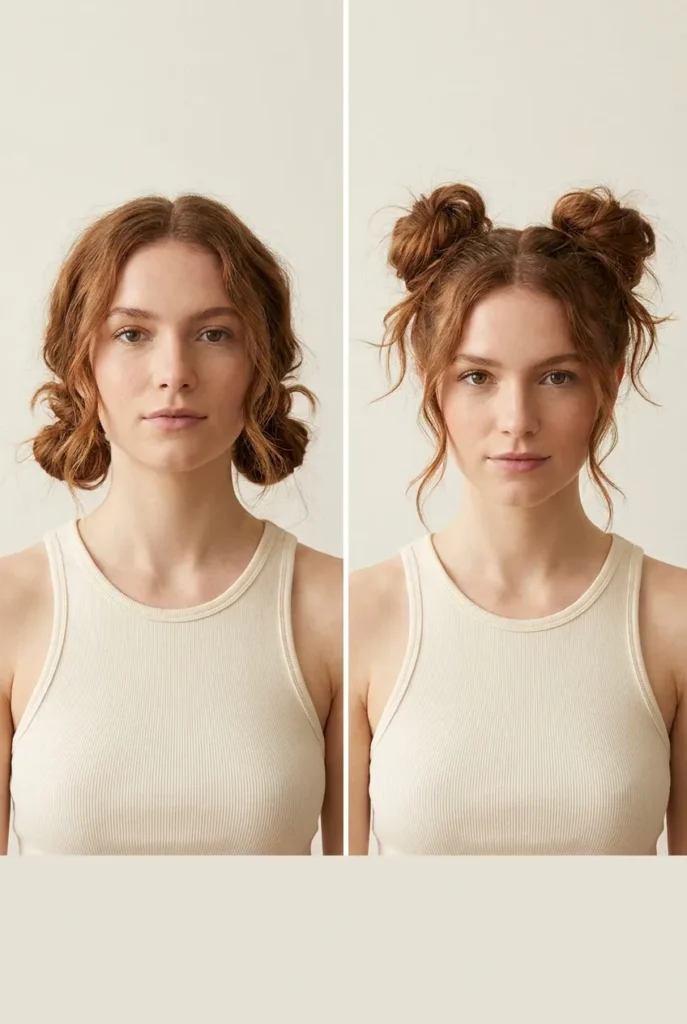
Low space buns sit at the nape of your neck instead of the crown. Same method, you just gather the two ponytails low and slightly behind each ear instead of high. Low messy space buns are the easy-going off-duty cousin of the classic. Pair them with a slip dress or an oversized button-down and they read effortless, not Y2K-themed.
Messy space buns are exactly what they sound like. Skip the slicked roots, pull a few strands loose around the buns themselves after pinning, and finish with a heavy spray of texture. The deliberate mess is the point. If you can’t decide between cute and lazy-day, this is your version.
Space Buns With a Hat (The Underrated Move)
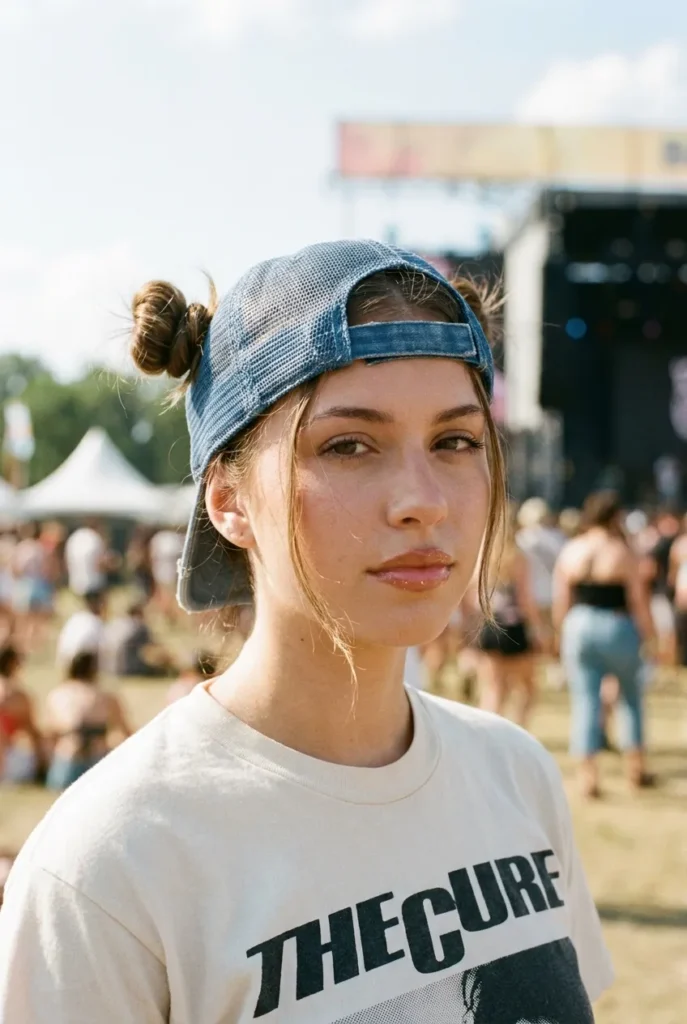
Almost nobody covers this and it’s a top Pinterest autocomplete result. Space buns with a hat is the move when you want the hair without the full commitment to a hairstyle that says LOOK AT ME.
Best hat shapes to pair:
- Trucker hat (the most authentic 2000s callback). Buns sit at the back, hat sits forward. Pop two small buns right at the back of your crown so they peek out below the hat band.
- Bucket hat. Lower the buns to sit at the nape so they peek out from under the hat’s brim. This is the festival uniform.
- Newsboy cap. Tiny low buns work best here. Tuck the buns under the cap line.
- Baseball cap. Pull through the back gap of the cap so the buns sit just above the strap.
Skip wide-brim hats, fedoras, and structured felt hats. The brim covers the buns entirely and the whole point of the look disappears.
How to Style Space Buns Like an Adult, Not a Costume
This is the section the top-ranking tutorials skip entirely, and it’s the difference between cute revival and cringe.
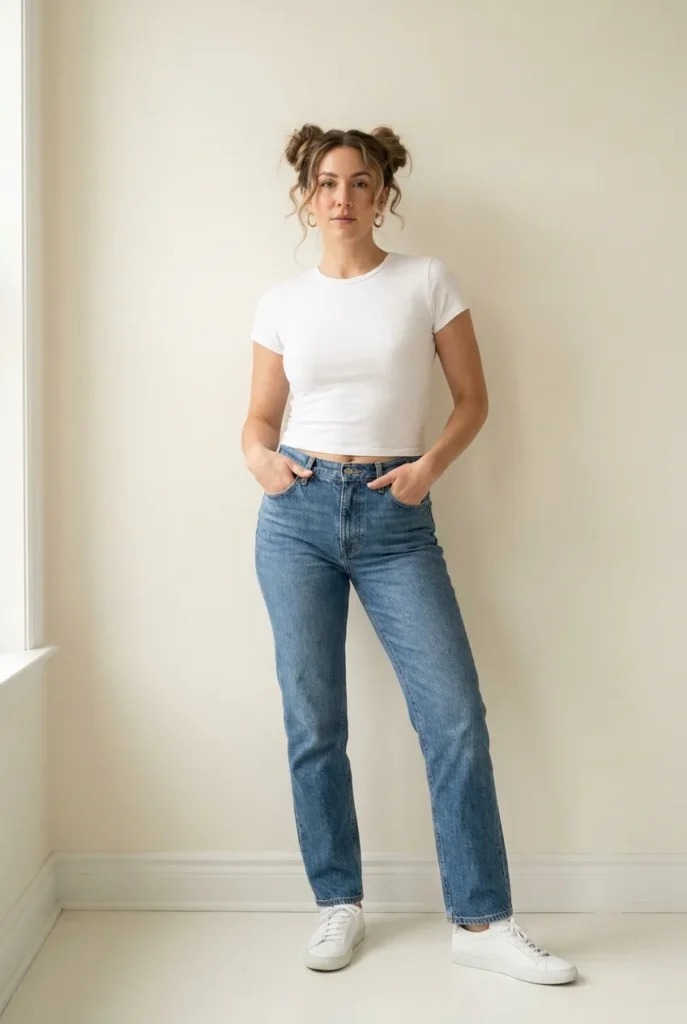
Wear one statement piece, not five. If the buns are doing the Y2K work, your outfit can be quiet. White baby tee, dark jeans, sneakers. Done. A halter top is also a great pairing and we cover that styling logic in detail in our halter top outfit guide.
Tone down the accessories. Two butterfly clips, one rhinestone choker, three rings, a slogan trucker hat, and a sparkly skirt is too much and your face will get lost in it. Pick one nostalgia detail and let the buns do the rest.
Mind the makeup. Space buns plus heavy frosted blue eyeshadow plus glossy lip plus rhinestone face decals will read as a Halloween costume. Pick one of those (the gloss, probably) and keep the rest modern.
Adjust the placement to your face. Very high buns can elongate a long face shape. If yours is longer, drop the buns slightly lower and pull more face-framing pieces forward. Round face shapes can take higher placement easily.
For readers over 30: lean messy over slicked. The slicked-back gel look is the strongest age signifier in this style. Softer roots, looser buns, and one tendril at each temple lands so much better than glassy slick.
For a deeper look at the broader Y2K aesthetic and how to wear it without hitting costume territory, our 2000s it-girl aesthetic guide is the companion piece to this one. And if you want to nail the exact color story that makes a Y2K look feel current versus dated, our Y2K color palette guide breaks down which shades to lean into and which to skip.
Where to Shop the Look (US Retailers)
- Mini elastics, bobby pins, rat-tail comb: Target, Walmart, Sally Beauty (under $15 total)
- Texturizing spray: Ulta, Target, Amazon (Living Proof, Not Your Mother’s, Batiste, $8 to $25)
- Edge control: Sally Beauty, Target, Amazon (Mielle, The Mane Choice, Eco Style, $4 to $10)
- Cute hair clips for the nostalgic finishing touch: Urban Outfitters, Edikted, Amazon, Princess Polly ($4 to $20)
- Trucker hats for the hat-and-buns combo: Urban Outfitters, Princess Polly, Amazon ($15 to $40)
- Authentic vintage butterfly clips: Depop, Poshmark, eBay (varies, often $5 to $25 a set)
The total damage for a complete kit, if you have nothing right now, is under $40.
Space Buns FAQ
How do you do space buns step by step?
Use the PARK Method. Part your hair down the middle from your hairline to your crown, anchor each side into a high ponytail with a mini clear elastic, rotate the ponytail by twisting and coiling it around the base in mirrored directions, kiss the ends down with bobby pins angled into the elastic, then finish with texturizing spray and two face-framing tendrils. Five steps, under five minutes once you’ve done it twice.
How do you make space buns look professional?
Three details separate amateur from polished. First, draw the center part with a rat-tail comb, not your fingers, and stop the part at the crown. Second, match the height of both ponytails exactly using your ear and forehead corner as landmarks. Third, mirror the coil direction so one bun spirals clockwise and the other counter-clockwise. That symmetry is what reads as professional.
Can you do space buns with just hair ties?
Yes. The bobby pins are optional if you wrap the elastic tight enough, especially with shorter hair where the tail is short and tucks under naturally. Pick two mini clear elastics, wrap each three times, and coil the ponytail tightly around the base. Hair ties only is the easiest space buns tutorial for kids, gym days, or anytime you don’t have bobby pins handy.
What makes a hairstyle “space buns”?
High placement and a clear center part. Two buns sitting at the back of your head are just double buns. Two buns lined up symmetrically on the top half of your head, split by a defined part, are space buns. The Y2K era cemented the name because the placement looked a little like Princess Leia’s space-styled hair, and the early 2000s music video circuit ran with it.
How do you do space buns on short hair?
Switch to half-up space buns. Take only the top section of hair from ear to ear, split it down the middle, and form two small buns from that top section. Leave the rest of your short hair loose. This works on bobs and lobs from chin-length and longer. The mini bun shape is the goal, not a full chunky bun.
How do you style space buns over 30 without looking costumey?
Lean messy not slicked, pair with one quiet outfit not a full Y2K look, skip heavy frosted makeup, and use one nostalgia accessory at most. The gel-slick roots are the strongest age signifier in this hairstyle, so a soft textured root reads modern at any age. Pair with a plain baby tee, mid-rise denim, and clean white sneakers and you’re already at editorial, not costume.
Where can I find authentic 2000s hair accessories on a budget?
Depop, Poshmark, and eBay are the best sources for real vintage butterfly clips and snap clips, usually $5 to $25 a set. Dollar Tree carries surprisingly cute basic snap clips for $1.25. Urban Outfitters and Princess Polly stock modern reproductions if you want the look without the hunt.
Final Thought
Space buns are the easiest entry point into Y2K hair you’ll ever find. Five steps, four tools, zero commitment, infinite payoff. Try the classic high version this weekend, then try the half-up version next week, then test the trucker hat combo at the next concert. Save this guide to your hair board for the visuals, and when you nail your first set, send me a photo. I’m not even kidding.
If you want to keep going, the Christina Aguilera style guide breaks down another iconic bun-and-pigtail moment from the same era and how to pull it off now.